Hey there, tech enthusiasts! If you're diving into the world of IoT (Internet of Things) and looking for a reliable way to set up remote monitoring using Raspberry Pi, you've come to the right place. Remote IoT monitoring with Raspberry Pi is becoming a go-to solution for hobbyists, engineers, and even businesses. Whether you're tracking environmental conditions, managing smart home devices, or monitoring industrial equipment, this setup can be your secret weapon. Let's break it down step by step so you can get started without breaking a sweat.
Now, I know what you're thinking. "Is this going to be complicated?" Don't worry, my friend. We'll keep it simple, practical, and packed with actionable tips. By the end of this guide, you'll have a clear understanding of how Raspberry Pi can transform your IoT projects into something truly remarkable.
So, buckle up and grab your favorite drink because we're about to embark on a tech journey that could change the way you approach IoT monitoring. Let's make it happen!
Read also:Leila George The Rising Star Redefining Hollywoods Landscape
What is Remote IoT Monitoring?
Remote IoT monitoring is like having a set of eyes and ears everywhere you need them, but without physically being there. Imagine being able to track temperature, humidity, motion, or even energy consumption from anywhere in the world. Sounds cool, right? This technology allows you to collect real-time data from sensors and devices, analyze it, and make informed decisions—all from the comfort of your desk or smartphone.
Why Raspberry Pi is Perfect for Remote IoT Monitoring
Raspberry Pi is more than just a tiny computer; it's a powerhouse for DIY tech projects. Its affordability, flexibility, and compatibility with various sensors and software make it an ideal choice for remote IoT monitoring. Plus, its community support is unmatched, meaning you'll never run out of resources or help when troubleshooting.
Key Features of Raspberry Pi for IoT
- Cost-Effective: Raspberry Pi is budget-friendly, making it accessible for both hobbyists and professionals.
- Versatile: It can run a wide range of operating systems and software, giving you endless possibilities.
- Low Power Consumption: Ideal for long-term projects where power efficiency is crucial.
- Community Support: A vast network of users and developers ready to assist you with tips and tricks.
Setting Up Your Raspberry Pi for IoT Monitoring
Before we dive into the nitty-gritty, let's talk about the basics of setting up your Raspberry Pi for remote IoT monitoring. You'll need a few things to get started:
- Raspberry Pi (preferably the latest model)
- A microSD card with an operating system installed (Raspberry Pi OS is a great choice)
- A power supply
- Sensors (temperature, humidity, motion, etc.)
- A stable internet connection
Once you have all the essentials, follow these steps:
- Download and install Raspberry Pi OS on your microSD card.
- Connect your Raspberry Pi to a monitor, keyboard, and mouse to set it up initially.
- Update the system software to ensure everything runs smoothly.
- Install necessary libraries and tools for sensor integration.
Choosing the Right Sensors for Your Project
Picking the right sensors is crucial for your IoT monitoring project. Depending on what you're monitoring, you might need different types of sensors. Here are some popular options:
- Temperature and Humidity Sensors: Perfect for environmental monitoring.
- Motion Sensors: Ideal for security and activity tracking.
- Light Sensors: Great for automating lighting systems.
- Gas Sensors: Useful for detecting air quality and potential hazards.
Remember, the choice of sensors will depend on your specific needs and the environment you're monitoring.
Read also:Goonies Monster The Unseen Villain That Left Us Spellbound
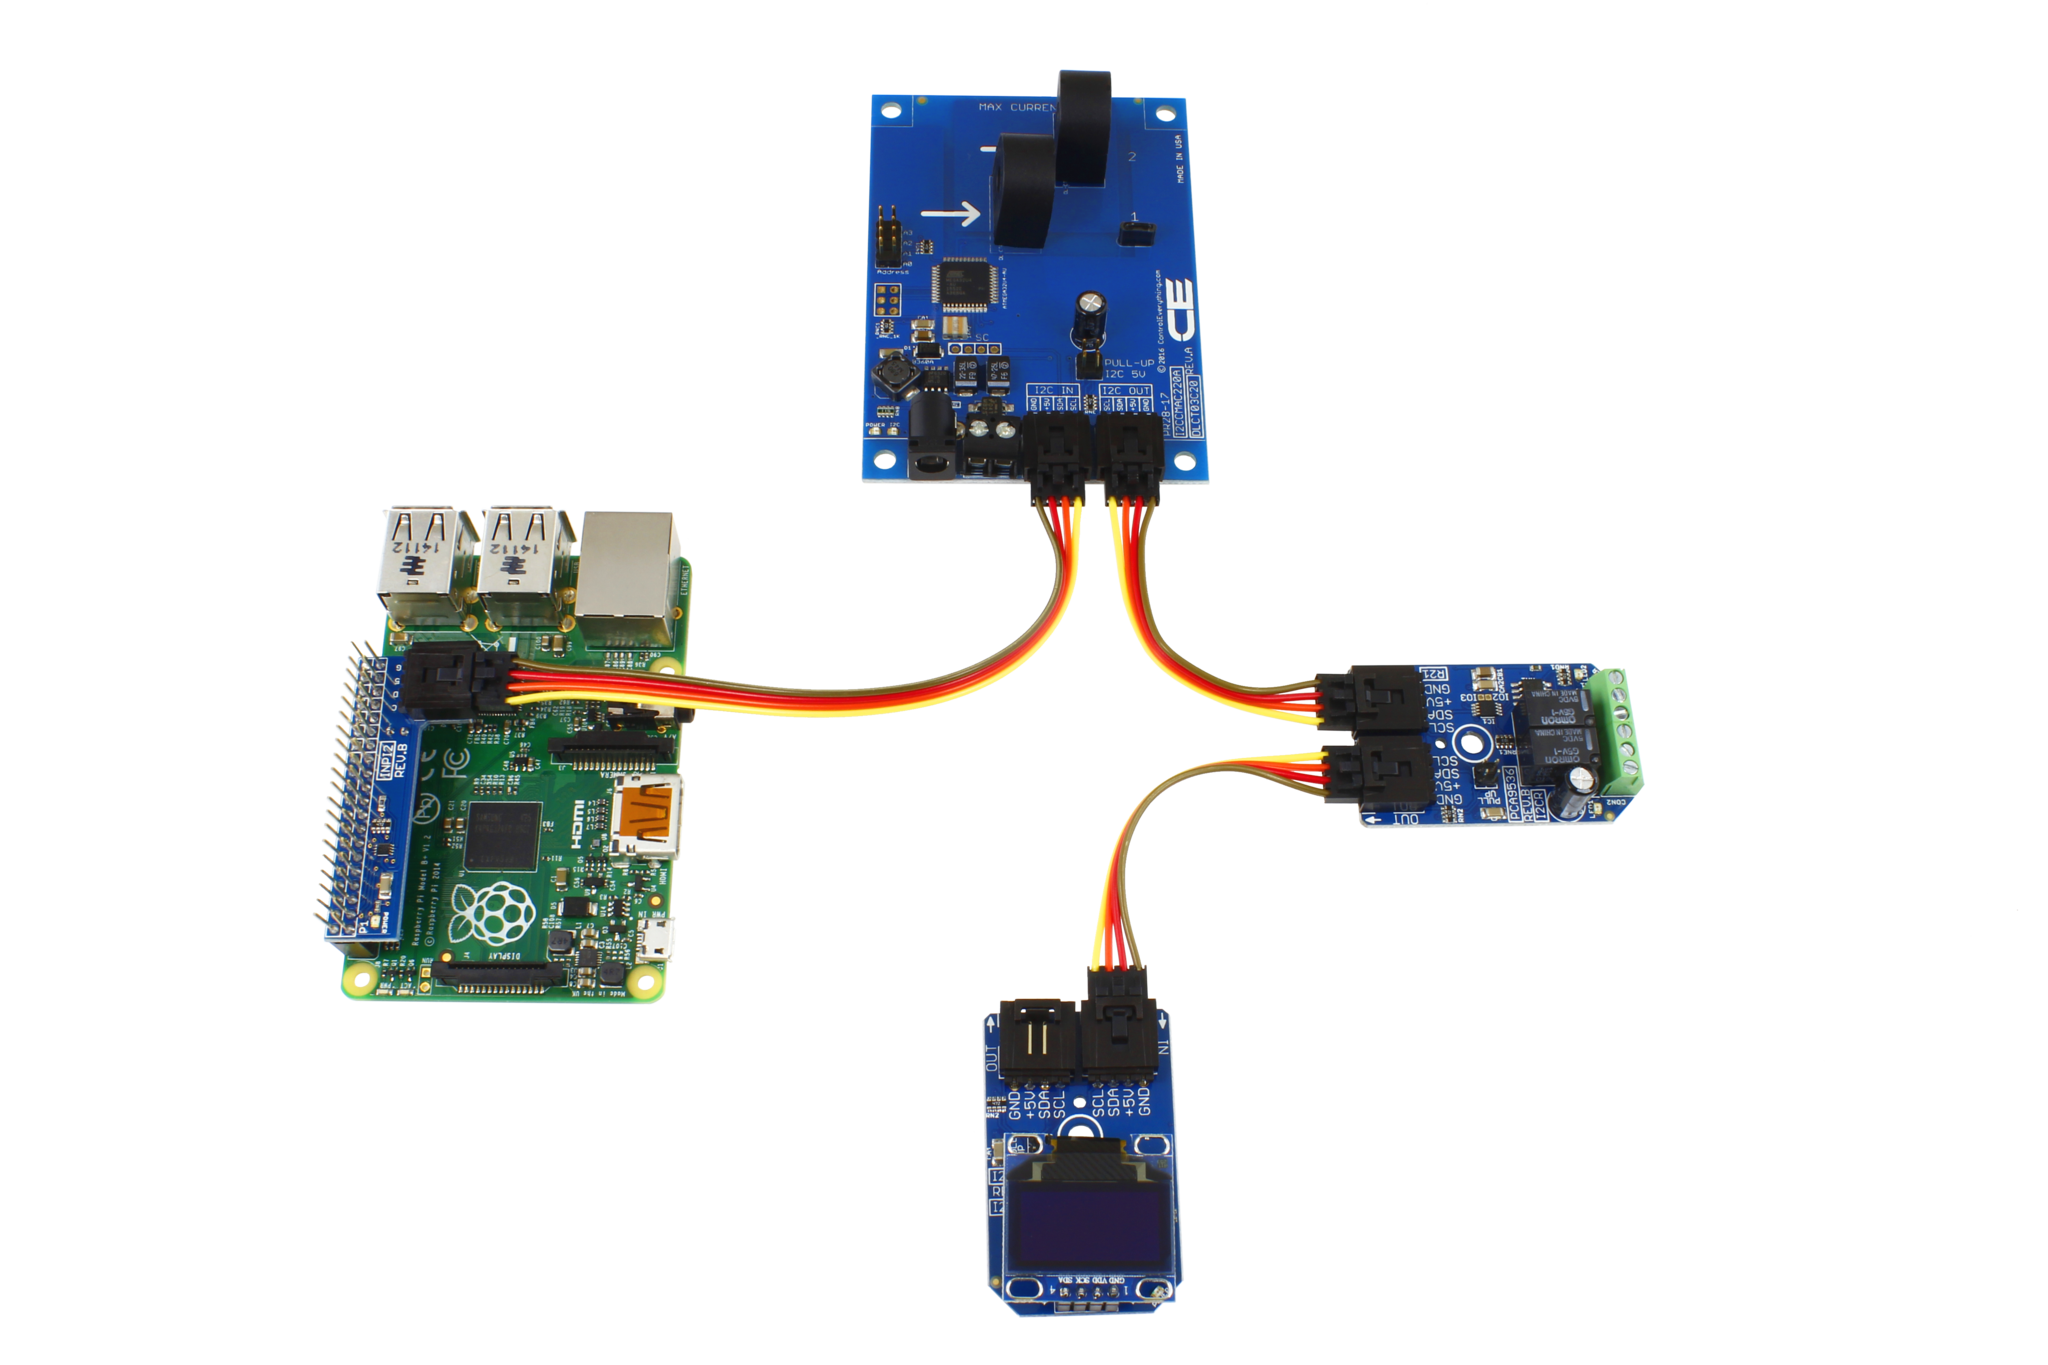
Connecting Sensors to Raspberry Pi
Connecting sensors to Raspberry Pi is easier than you might think. Most sensors come with clear instructions and wiring diagrams, but here's a quick rundown:
First, identify the GPIO pins on your Raspberry Pi. These pins are where you'll connect your sensors. Use jumper wires to connect the sensor's power, ground, and data pins to the corresponding GPIO pins on the Raspberry Pi. Make sure to double-check the connections to avoid any mishaps.
Next, install the necessary drivers or libraries to communicate with the sensors. For example, if you're using a DHT22 temperature and humidity sensor, you'll need to install the Adafruit DHT library. This will allow your Raspberry Pi to read data from the sensor accurately.
Setting Up Data Collection and Storage
Data collection is the heart of any IoT monitoring project. You'll need a way to store and analyze the data collected by your sensors. Here's how you can set it up:
Using a Local Database
For small-scale projects, setting up a local database on your Raspberry Pi can be a great option. SQLite is a lightweight and easy-to-use database that works well with Raspberry Pi. You can store sensor data in SQLite and retrieve it whenever needed.
Cloud-Based Solutions
If you're looking for scalability and accessibility, cloud-based solutions like AWS IoT Core or Google Cloud IoT Core are excellent choices. These platforms allow you to send sensor data to the cloud, where you can analyze and visualize it in real time.
Regardless of the method you choose, make sure to implement proper data security measures to protect your information.
Remote Access and Monitoring
One of the coolest aspects of remote IoT monitoring is the ability to access your data from anywhere. Here's how you can set it up:
- SSH (Secure Shell): Use SSH to remotely access your Raspberry Pi from another computer.
- VNC (Virtual Network Computing): VNC allows you to remotely control your Raspberry Pi's graphical interface.
- Web Interface: Create a web interface to display sensor data in real time. You can use frameworks like Flask or Django to build a custom dashboard.
By setting up remote access, you'll be able to monitor your IoT devices even when you're miles away.
Troubleshooting Common Issues
Even the best-laid plans can hit a snag. Here are some common issues you might encounter and how to fix them:
- Connection Problems: Ensure your Raspberry Pi is connected to a stable Wi-Fi network. Check the router settings and try restarting the device.
- Sensor Calibration: If your sensor readings are inaccurate, try recalibrating the sensor or checking the wiring.
- Data Storage Issues: Make sure your database is properly configured and has enough storage space. Regularly back up your data to avoid loss.
Remember, troubleshooting is part of the learning process. Don't get discouraged if things don't work perfectly the first time. Keep experimenting and tweaking until you get the desired results.
Best Practices for Secure IoT Monitoring
Security should always be a top priority when working with IoT devices. Here are some best practices to keep your remote IoT monitoring system secure:
- Use strong passwords and enable two-factor authentication wherever possible.
- Keep your software and firmware up to date to protect against vulnerabilities.
- Limit access to your Raspberry Pi and sensitive data by using firewalls and network segmentation.
By following these practices, you'll ensure that your IoT monitoring system remains safe and reliable.
Future Trends in Remote IoT Monitoring
The world of IoT is evolving rapidly, and remote monitoring is no exception. Here are some exciting trends to watch out for:
- Edge Computing: Processing data closer to the source reduces latency and improves real-time decision-making.
- AI Integration: Artificial intelligence can enhance data analysis and prediction capabilities, making IoT systems smarter.
- Sustainability Focus: More emphasis on energy-efficient solutions to reduce the environmental impact of IoT devices.
These trends will shape the future of IoT monitoring, offering new opportunities and challenges for developers and users alike.
Conclusion
Remote IoT monitoring with Raspberry Pi is a powerful tool that can transform the way you approach data collection and analysis. From setting up your Raspberry Pi to choosing the right sensors and ensuring security, this guide has covered all the essential steps to help you get started.
So, what are you waiting for? Dive into the world of IoT and see how Raspberry Pi can revolutionize your projects. Don't forget to share your experience and feedback in the comments below. And if you liked this guide, check out our other articles for more tech tips and tricks!
Table of Contents
- What is Remote IoT Monitoring?
- Why Raspberry Pi is Perfect for Remote IoT Monitoring
- Key Features of Raspberry Pi for IoT
- Setting Up Your Raspberry Pi for IoT Monitoring
- Choosing the Right Sensors for Your Project
- Connecting Sensors to Raspberry Pi
- Setting Up Data Collection and Storage
- Remote Access and Monitoring
- Troubleshooting Common Issues
- Best Practices for Secure IoT Monitoring
- Future Trends in Remote IoT Monitoring